Building a TokenSwap Subgraph
Subgraph for TokenSwap contract

gm gm gm!!!
Indexing Blockchain Data is really really hard and indexing transactions of something like Uniswap is a lethal task. But The Graph Protocol greatly reduces the complexity of this.
We will be learning how to build, deploy, and play with Subgraph for a simple Token Swapping Contract.
The following are the prerequisites for this tutorial:
Building the Token Swap Contract
This is the Token Swap Contract we will be using for our example.
The following are the main functions we will be focusing on in our subgraph:
addLiquidity(uint256 _tokenAmount): This adds liquidity to the pool and emitsGraphKitExchange__LiquidityAddedevent.removeLiquidity(uint256 _amount): This removes liquidity from the pool and emitsGraphKitExchange__LiquidityRemovedevent.ethToTokenSwap(uint256 _minTokens): This swaps ETH to the Token and emitsGraphKitExchange__ETHToTokenSwapevent.tokenToETHSwap(uint256 tokenSold, uint256 minTokens): This swaps Token to ETH and emitsGraphKitExchange__TokenToETHSwapevent.
Having these above events is important as the Graph Nodes will be listening to these events and storing the data (defined in schema) as it gets emitted.
This is the Basic ERC20 Contract we will be using:
Deploy the Contracts
Now deploy these contracts using Remix on Polygon Munbai Testnet.
Token.sol first and then use that contract address and deploy GraphKitExchange.solHead to your Remix IDE and follow the steps:
Connect with the Injected Provider and select Polygon Mumbai Testnet as the network.
Get some TEST MATIC on Mumbai Testnet from the Faucet, here.
Deploy
Token.solCopy the above contract and paste it into the Remix file.
Then select the contract and enter the constructor parameters. I have entered
MEGABYTE,MBand100000000000000000000Hit Transact.
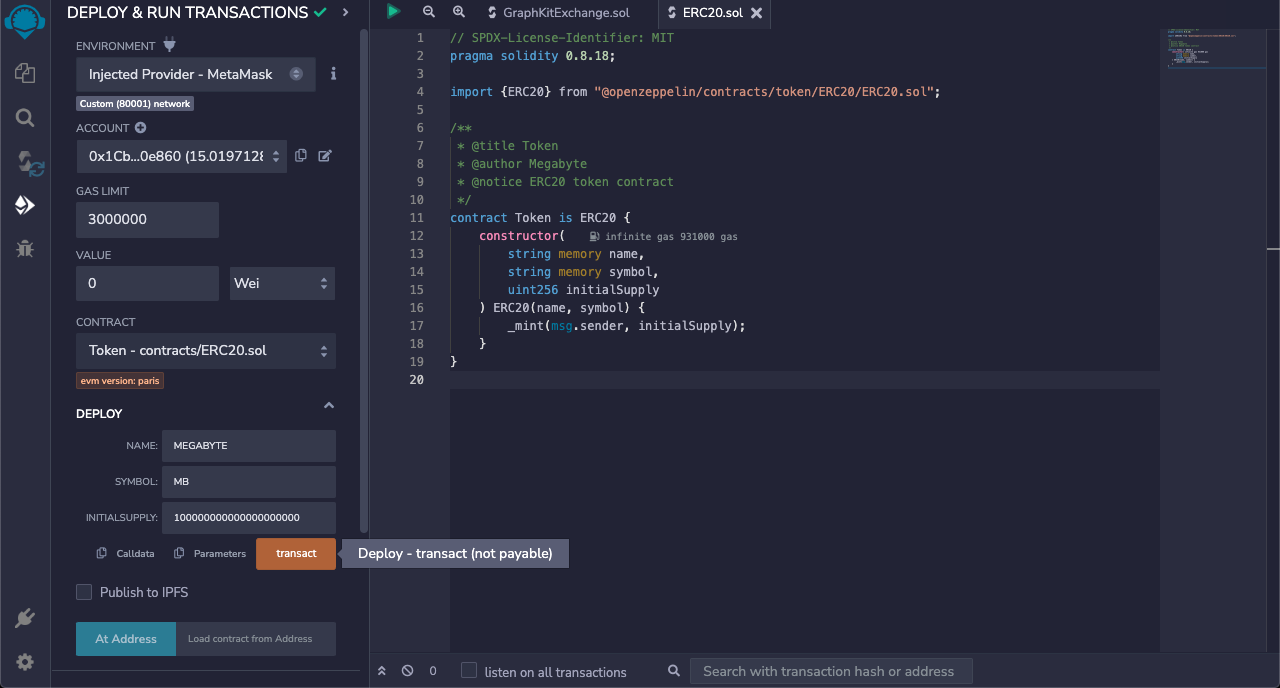
Copy the above GraphKitExchange code and paste the content of
GraphKitExchange.solin the Remix File.Copy the
Token.solContract Address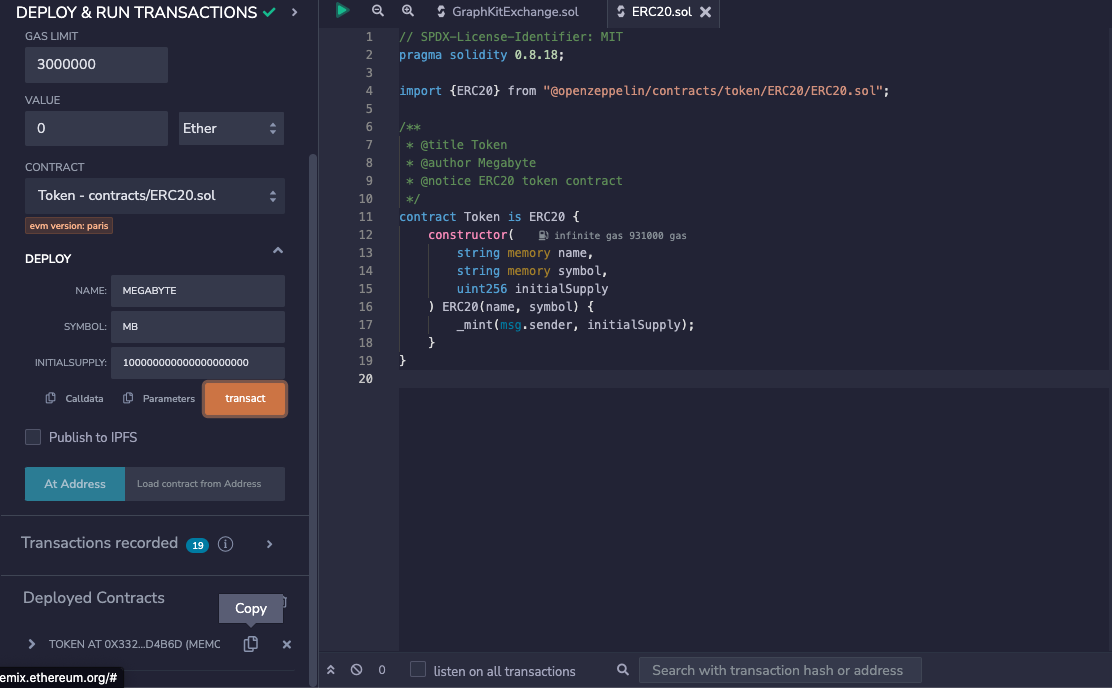
Select the GraphKitExchange.sol, paste the Token Contract Address, and hit Transact.

Verify the contracts on the Mumbai Scan
Learn how to do it here.
Keep both the contract addresses handy, we will be using them shortly.
Here are mine though:
Token Contract: 0xB2887fA56b2601cB5877A99188c3f23731F671F5Exchange Contract: 0xd8F178e60F3A7434F0F4E2519e6C2B89575f8123
Congrats your contracts are ready 🔥
Let's deploy the Subgraph for the same 🚀
Build the Subgraph
To build the Subgraph, these are the steps that need to be followed:
Create a Subgraph on Subgraph Studio.
Install the Graph Protocol CLI
Initialize your Subgraph
Deploying a Subgraph to Subgraph Studio
Before building the subgraph, if you wanna revisit the concepts of Subgraph check this out 👇🏻
Create a subgraph on Subgraph Studio
Head to https://thegraph.com/studio
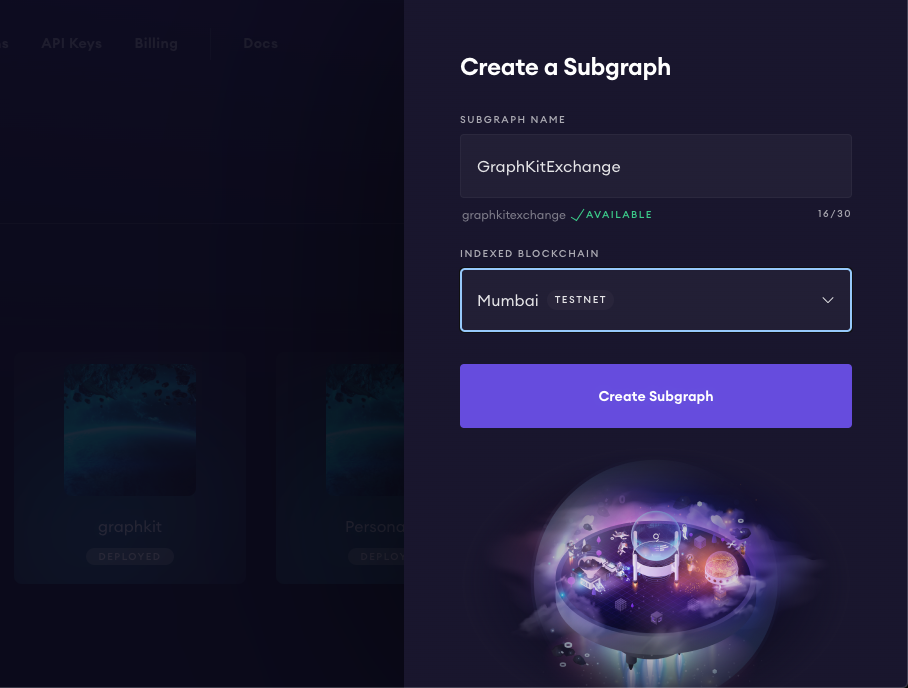
Create Subgraph on Polygon Mumbai Testnet
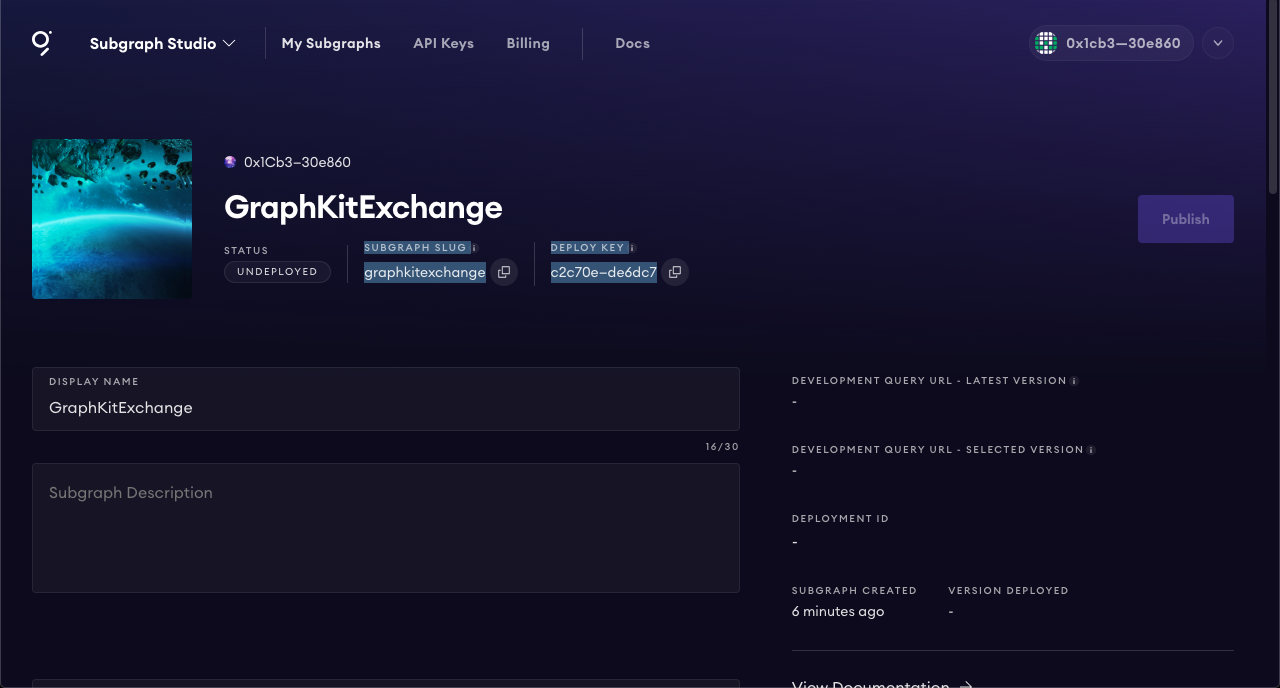
- Keep the Subgraph Slug and Deploy Key handy.
Install the Graph Protocol CLI
You need to install graph-cli to use the Subgraph Studio from your system.
Follow the steps for installing it:
Open up your terminal.
Paste the following command and hit ENTER:
yarn global add @graphprotocol/graph-cli
Initialize your Subgraph
It's time to start working on your Subgraph:
Create a new directory.
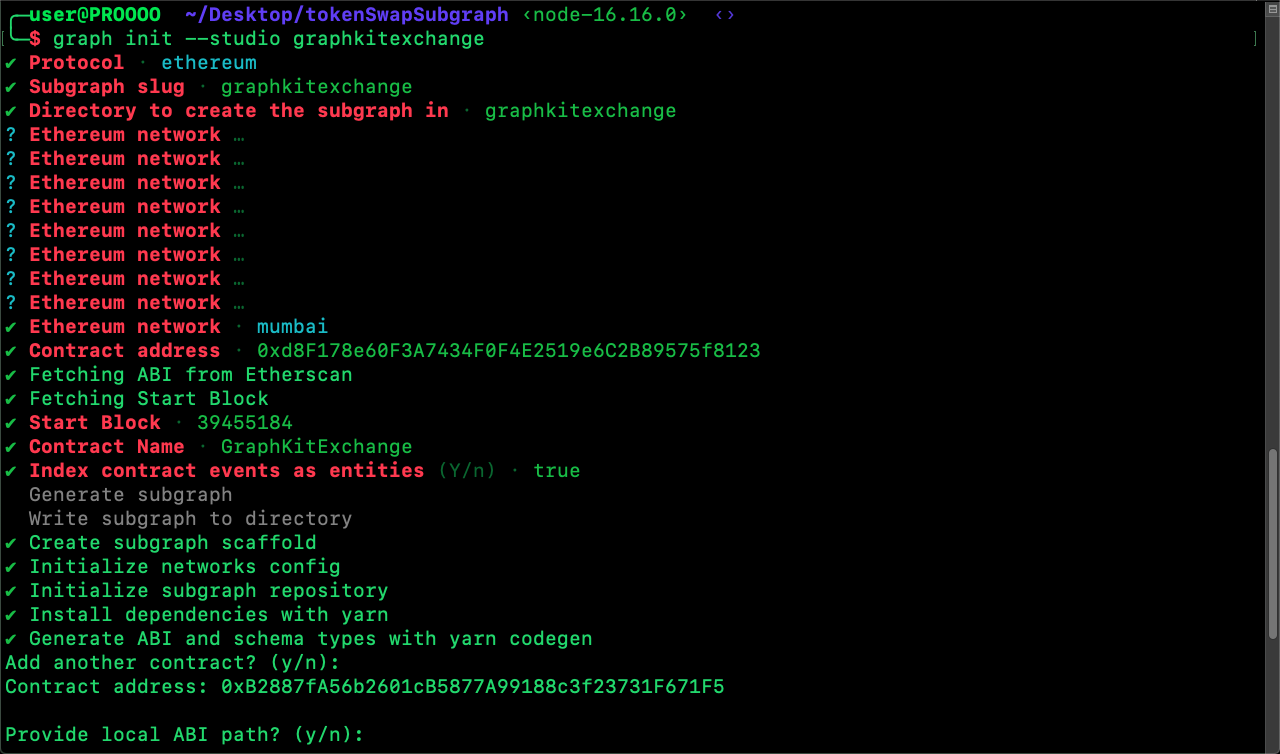
mkdir tokenSwapSubgraphInitialize the subgraph [Paste your subgraph slug]
graph init --studio <SUBGRAPH_SLUG>Choose
ethereumas the protocolEnter the subgraph slug name
Name the directory.
Select
mumbaias the Ethereum NetworkEnter the Contract Address for
GraphKitExchange.solcontract.Use the default start block.
Enter the name of the contract, here is
GraphKitExchangeSelect
truefor the index contract event as entitiesType
yfor entering a new contract address (forToken.sol)Type
nfor providing local ABI path.Enter the name of the contract, here is
Token
Here's how it will look in your terminal 👇🏻

Go to your subgraph directory
cd graphkitexchangeIn the directory, you can see the following files:

In the
srcdirectory you will see that it auto-generated the mappings for your subgraph as per the events in your contracts.
Your Subgraph is ready now. It's time to deploy it.
Deploy the Subgraph
We are almost done! Let's deploy our subgraph.
Authenticate your Graph Studio Key [Get Deploy Key from your subgraph studio]
graph auth --studio <DEPLOY KEY>Deploy your subgraph with your
subgraph sluggraph deploy --studio graphkitexchangeEnter the
v0.0.1as the version for your subgraphIn the end, you will see this 👇🏻

Here you got the subgraph endpoint, https://api.studio.thegraph.com/query/48418/graphkitexchange/v0.0.1
Whoo!!! That's a lot of work! But congrats 🤩 You deployed your subgraph for a Token Swapping Contract.
Play with the Subgraph using Subgraph Studio
So, it's time to use a decentralized, most effective and inexpensive way of querying the blockchain data.
I'll be using a Subgraph Playground for the same. [Not a frontend dev... hehe]
Creating Txn on the contracts
Before using the subgraph we need to create some transactions so we can query them.
Follow the steps to approve GraphKitExchange's contract address on Token Contract.
Open your
Token.solcontract on Mumbai Scan, and head towards theContractTab. Here's mine.Click on the
Writetab belowContracttab. Since you have already verified the contract, you will be able to Write transactions on it using the Etherscan UI.Connect your Metamask with the Etherscan by clicking on
Connect to Web3Now head to the
approvefunction and open the modal.Enter the address of the
GraphKitExchangecontract address and the amount inwei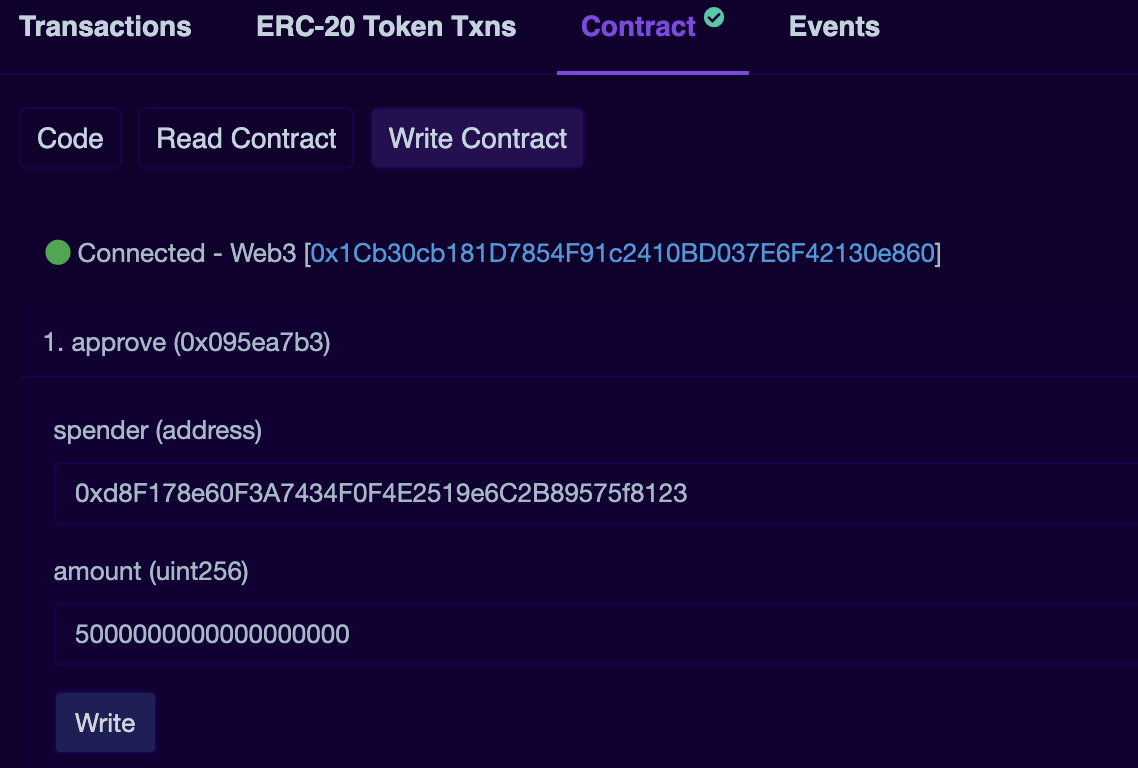
Click on
Writeand confirm the transaction.
Follow these steps to create your first transaction on the GraphKitExchange Contract:
Open your
GraphKitExchange.solcontract on Mumbai Scan, and head towards theContractTab. Here's mine.Click on the
Writetab belowContracttab. Since you have already verified the contract, you will be able to Write transactions on it using the Etherscan UI.Connect your Metamask with the Etherscan by clicking on
Connect to Web3Click on
addLiquidityand enter the 5 Matic and 5 MB (in wei) into the respective fields.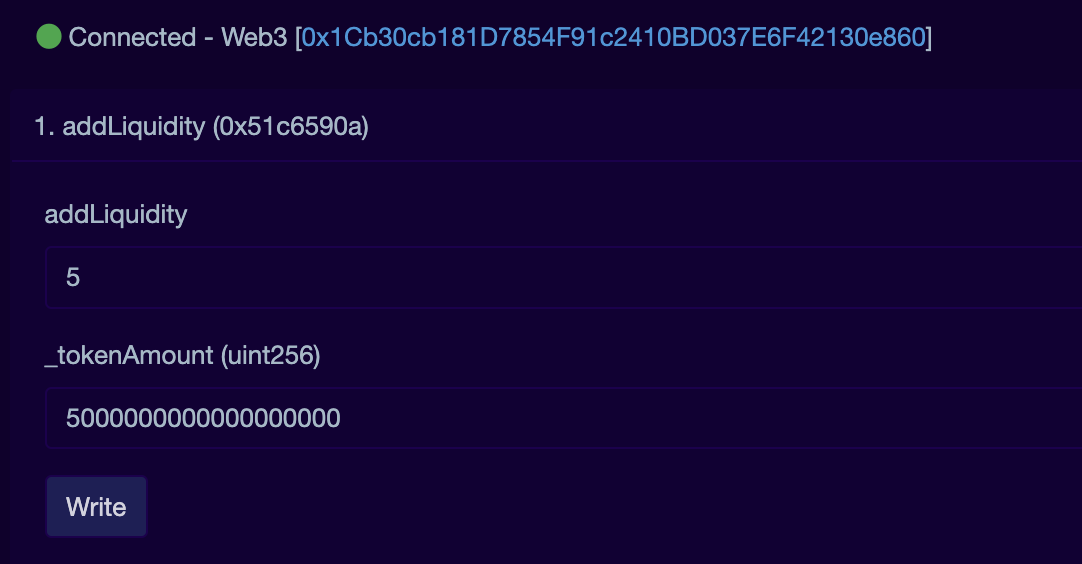
Click on
Writeand confirm the transaction.You will see a
View Transactionbutton, click on it and copy thetransaction hash
Voila! We are good to go with our subgraph.
Querying the Subgraph
Now we have a transaction ready in your GraphKitExchange Contract waiting to be queried by us.
Let's do this, by following these steps:
Head to your deployed Subgraph and select the playground. Mine is https://thegraph.com/studio/subgraph/graphkitexchange/playground
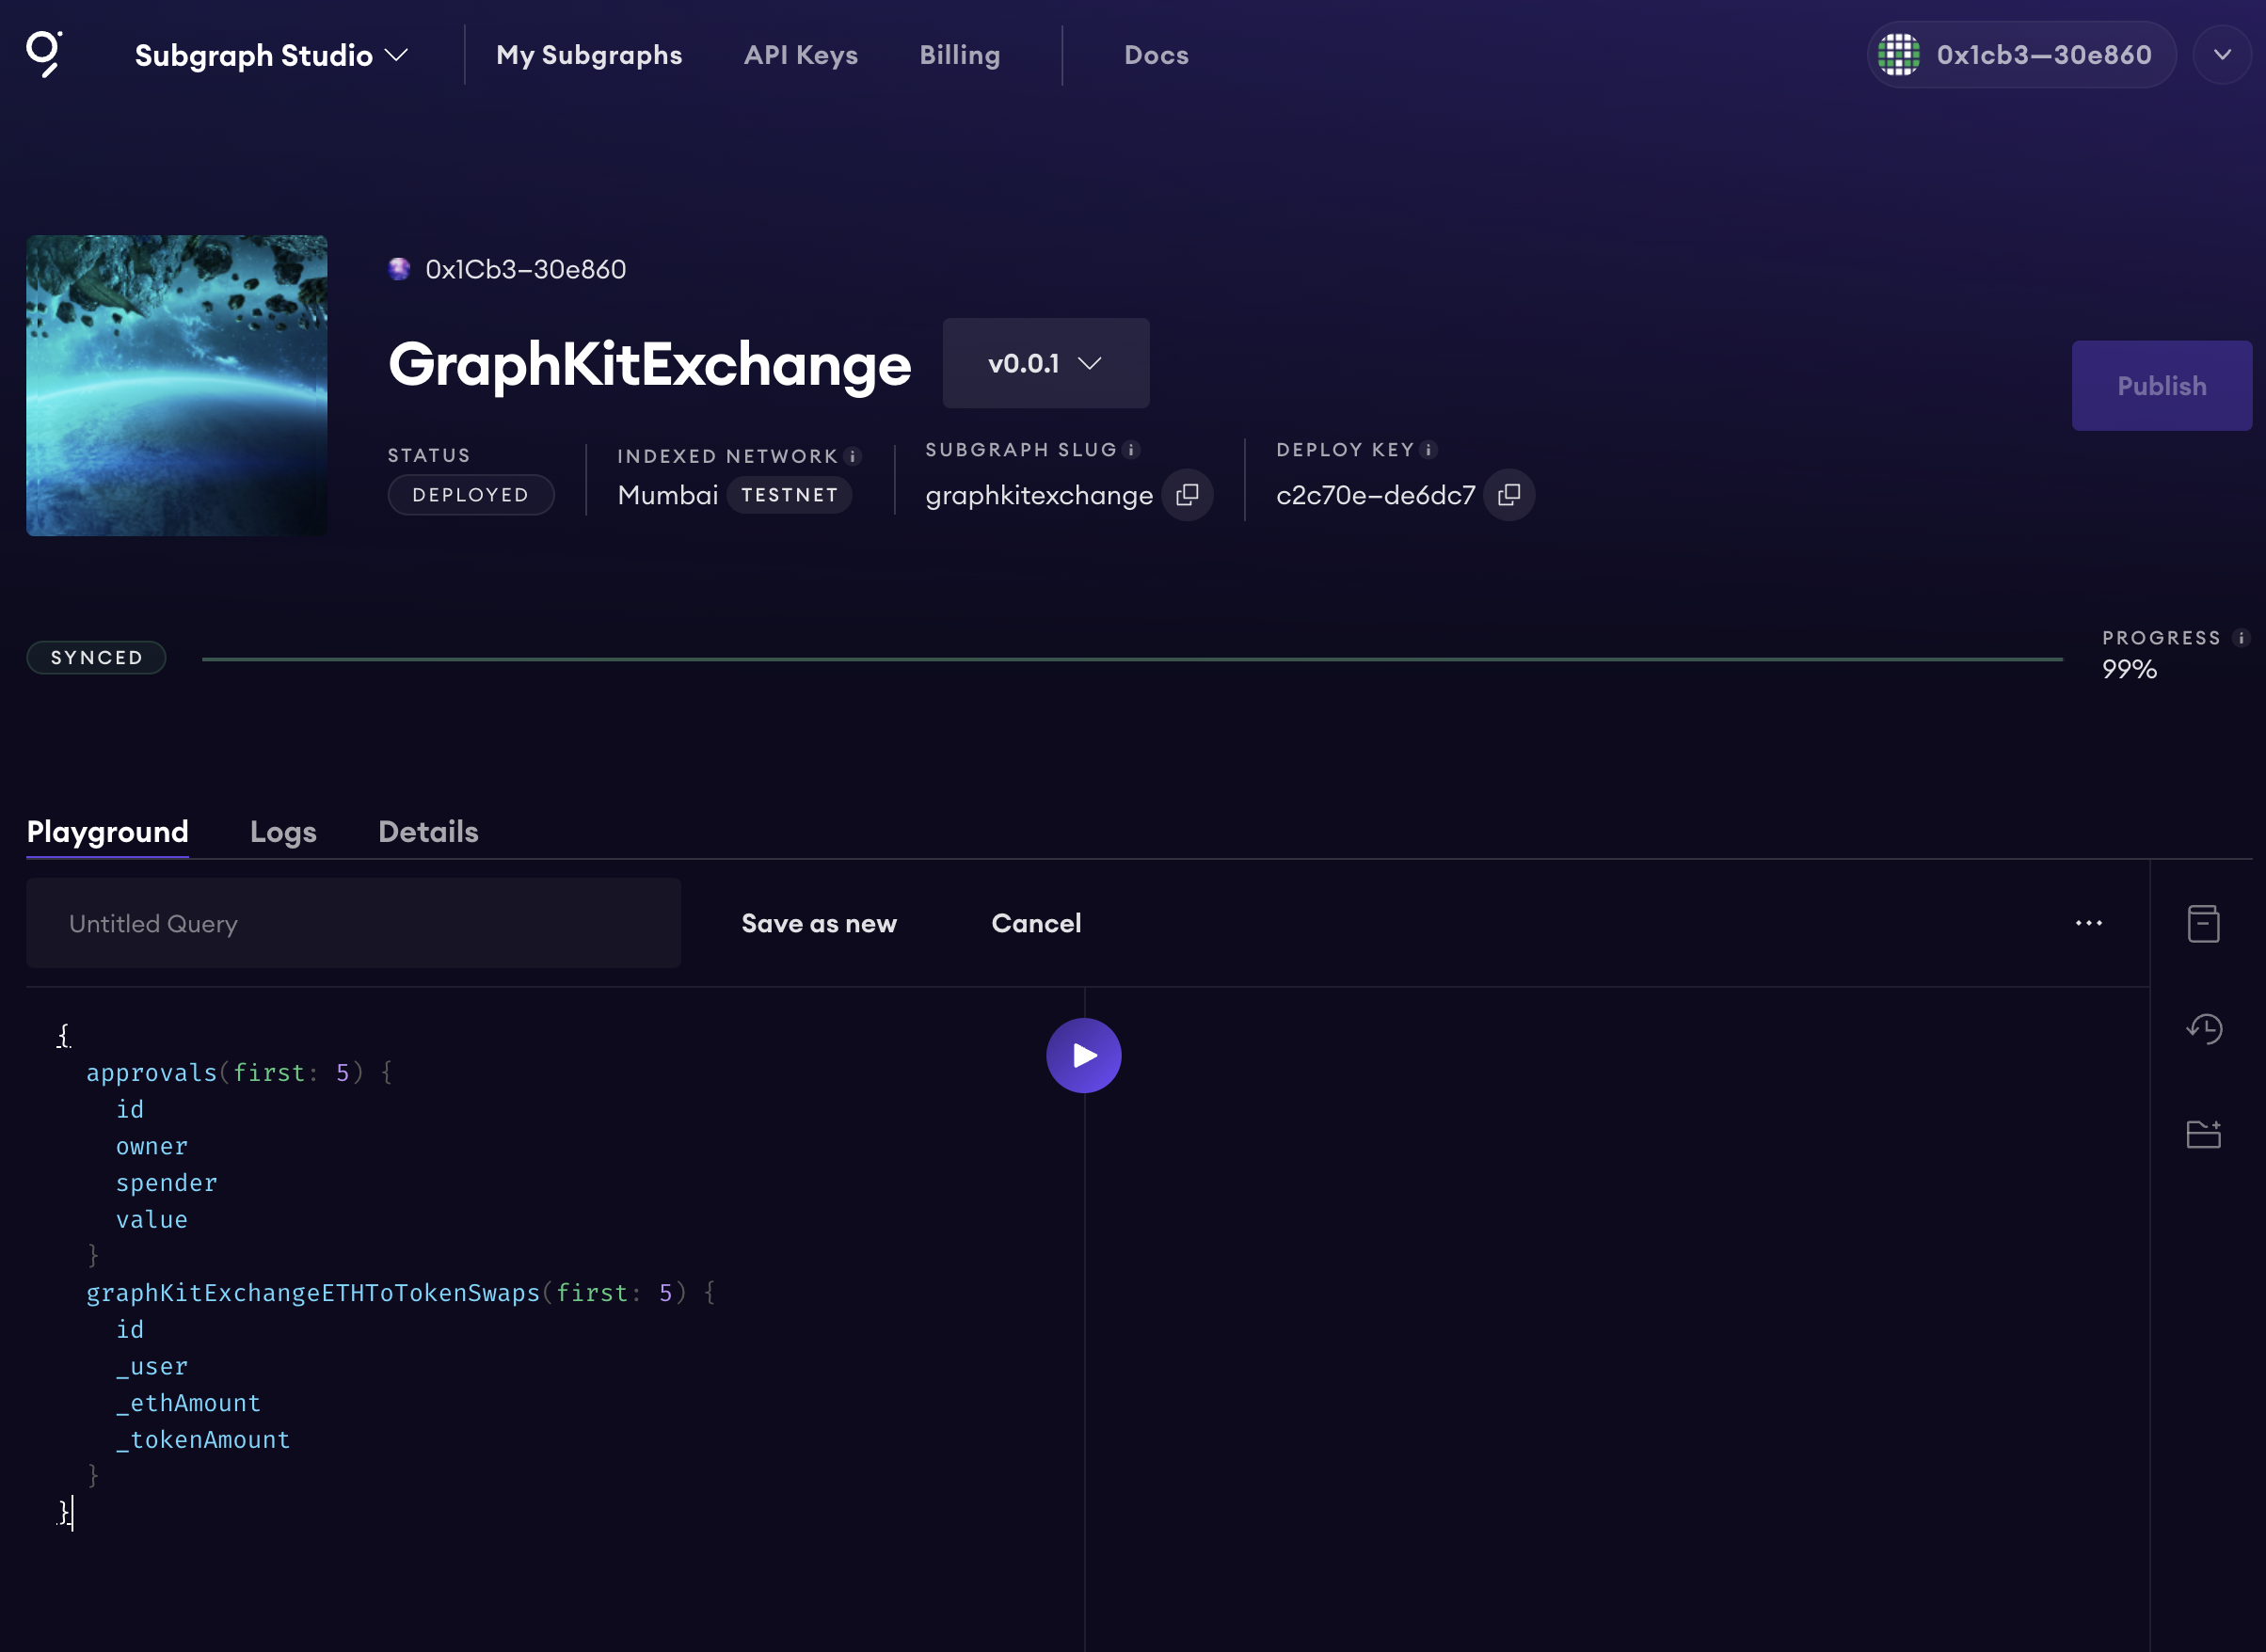
Now paste this into the query
query MyQuery { graphKitExchangeLiquidityAddeds (where: {transactionHash: "Your Transaction Hash"}){ _ethAmount _lpAmount _tokenAmount _user } }💢In "Your Transaction Hash" be sensible and paste your transaction hash 😂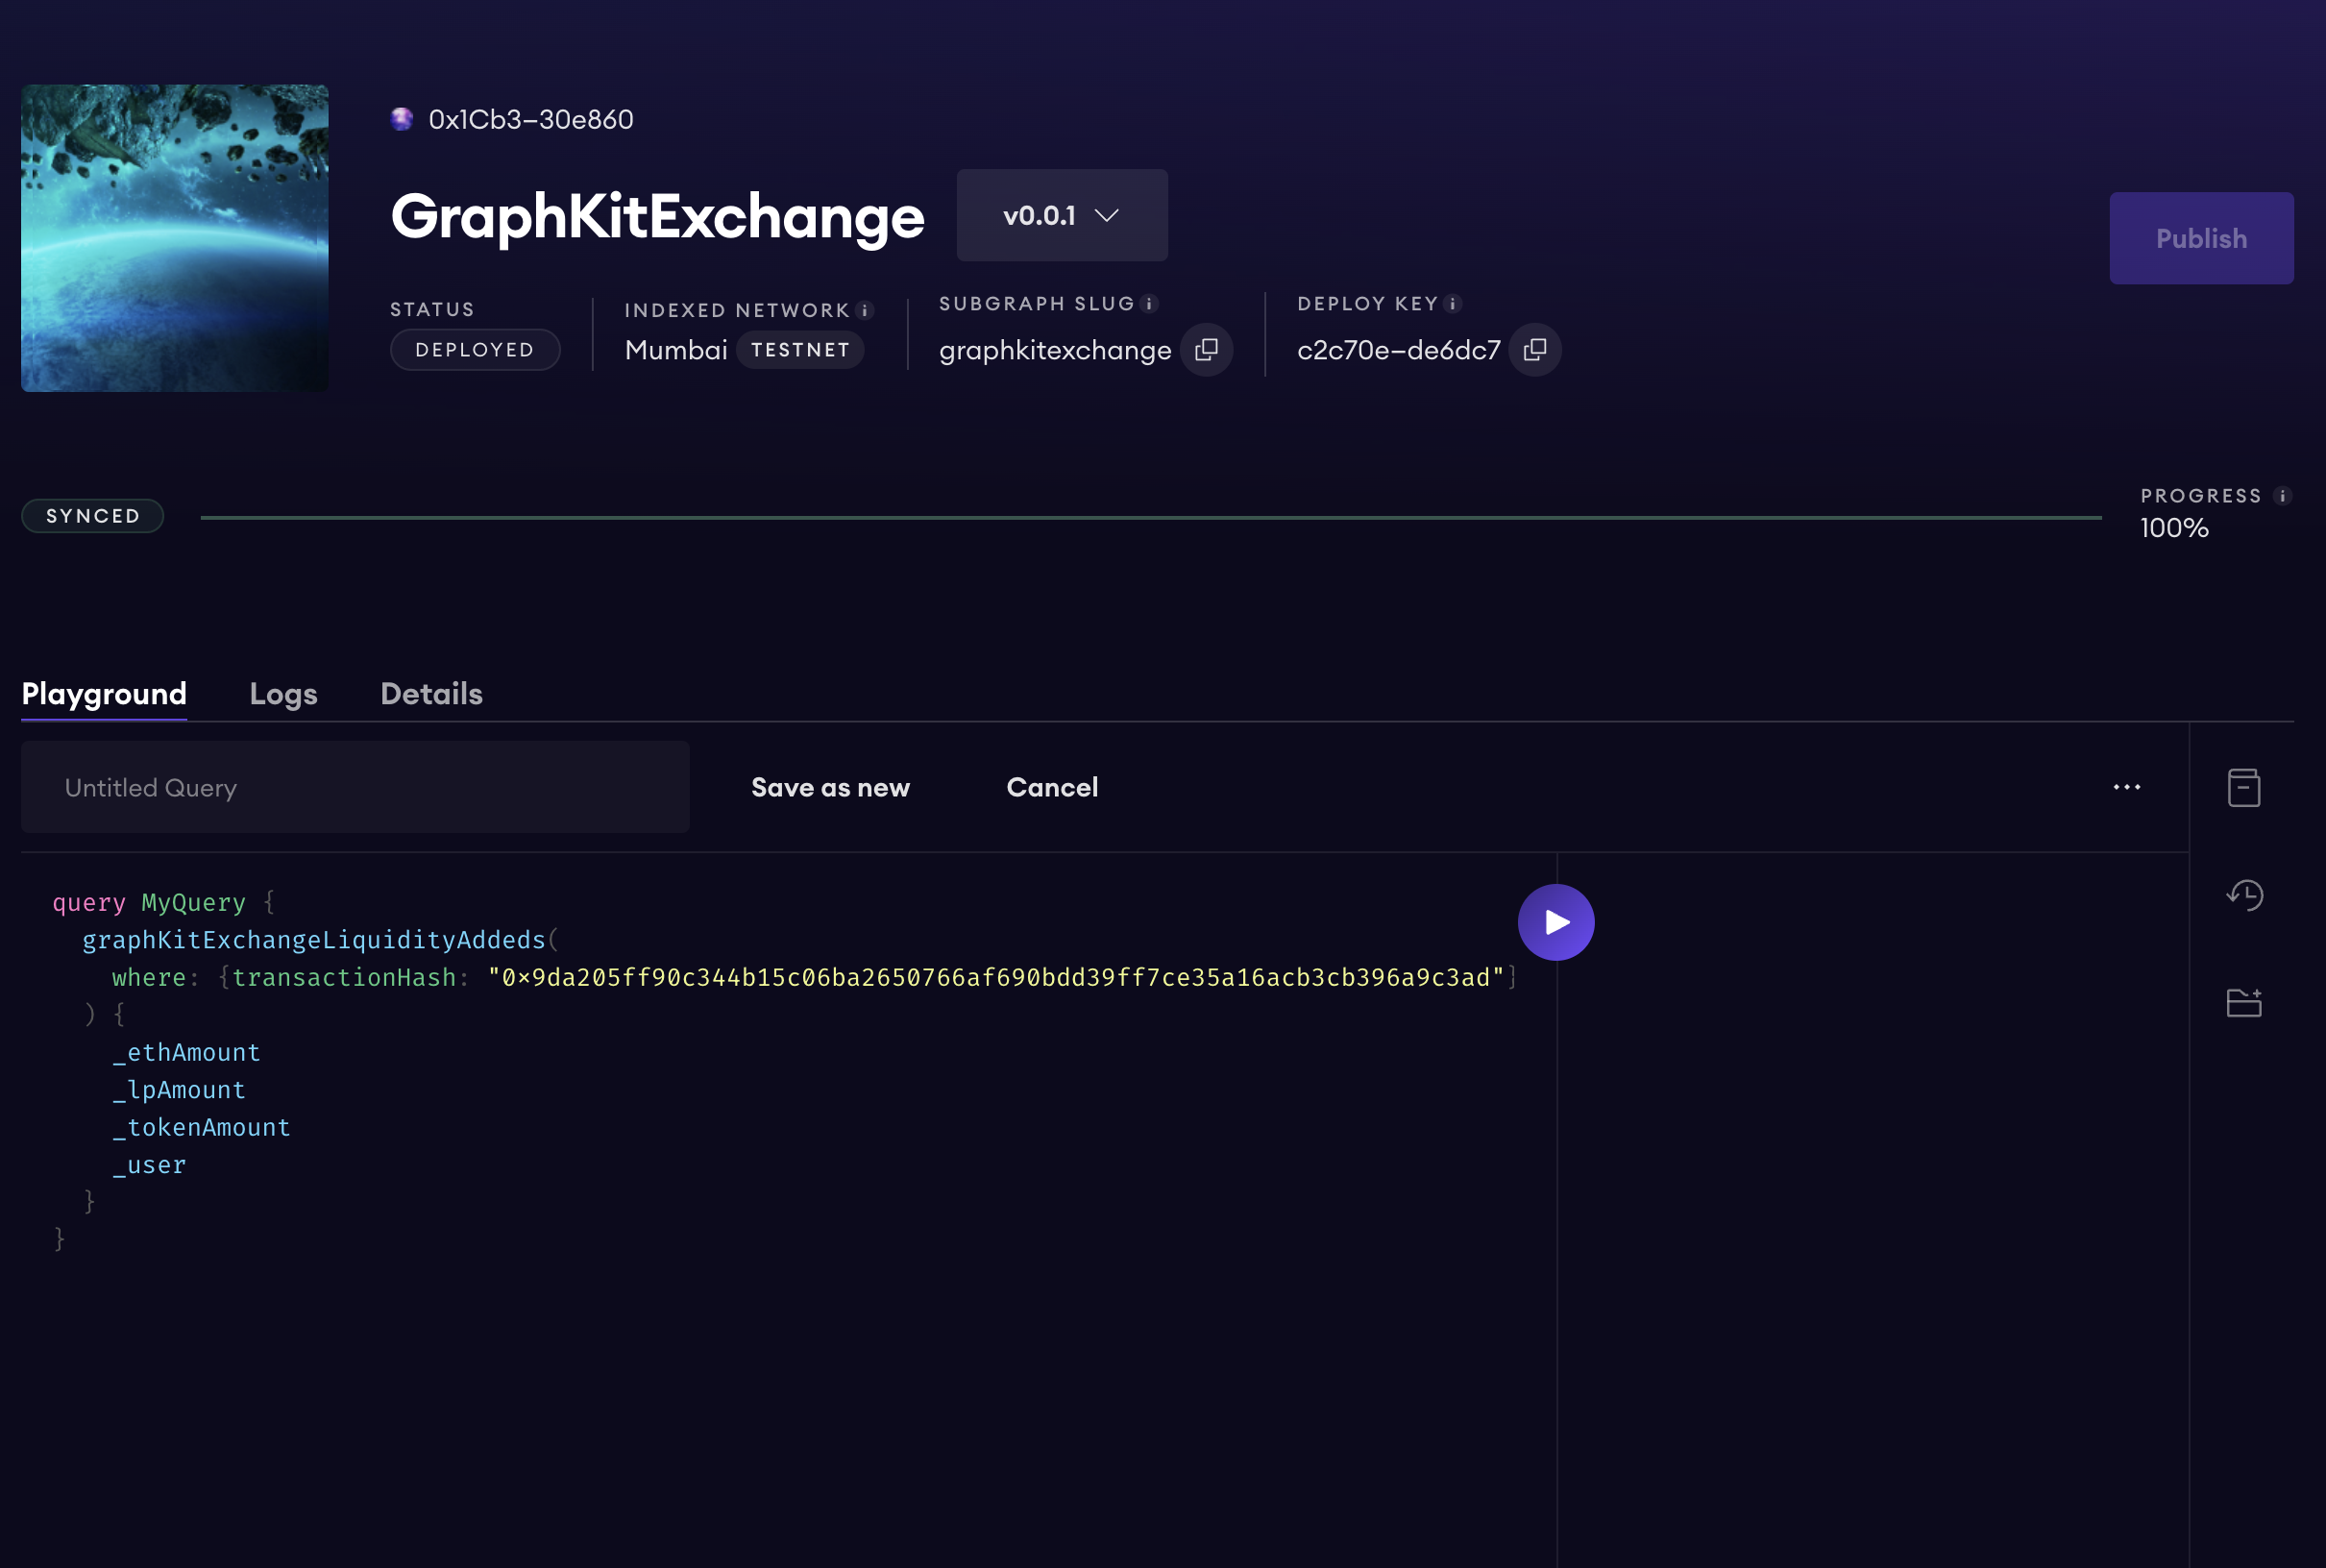
Now click on that YOUTUBE PLAY BUTTON
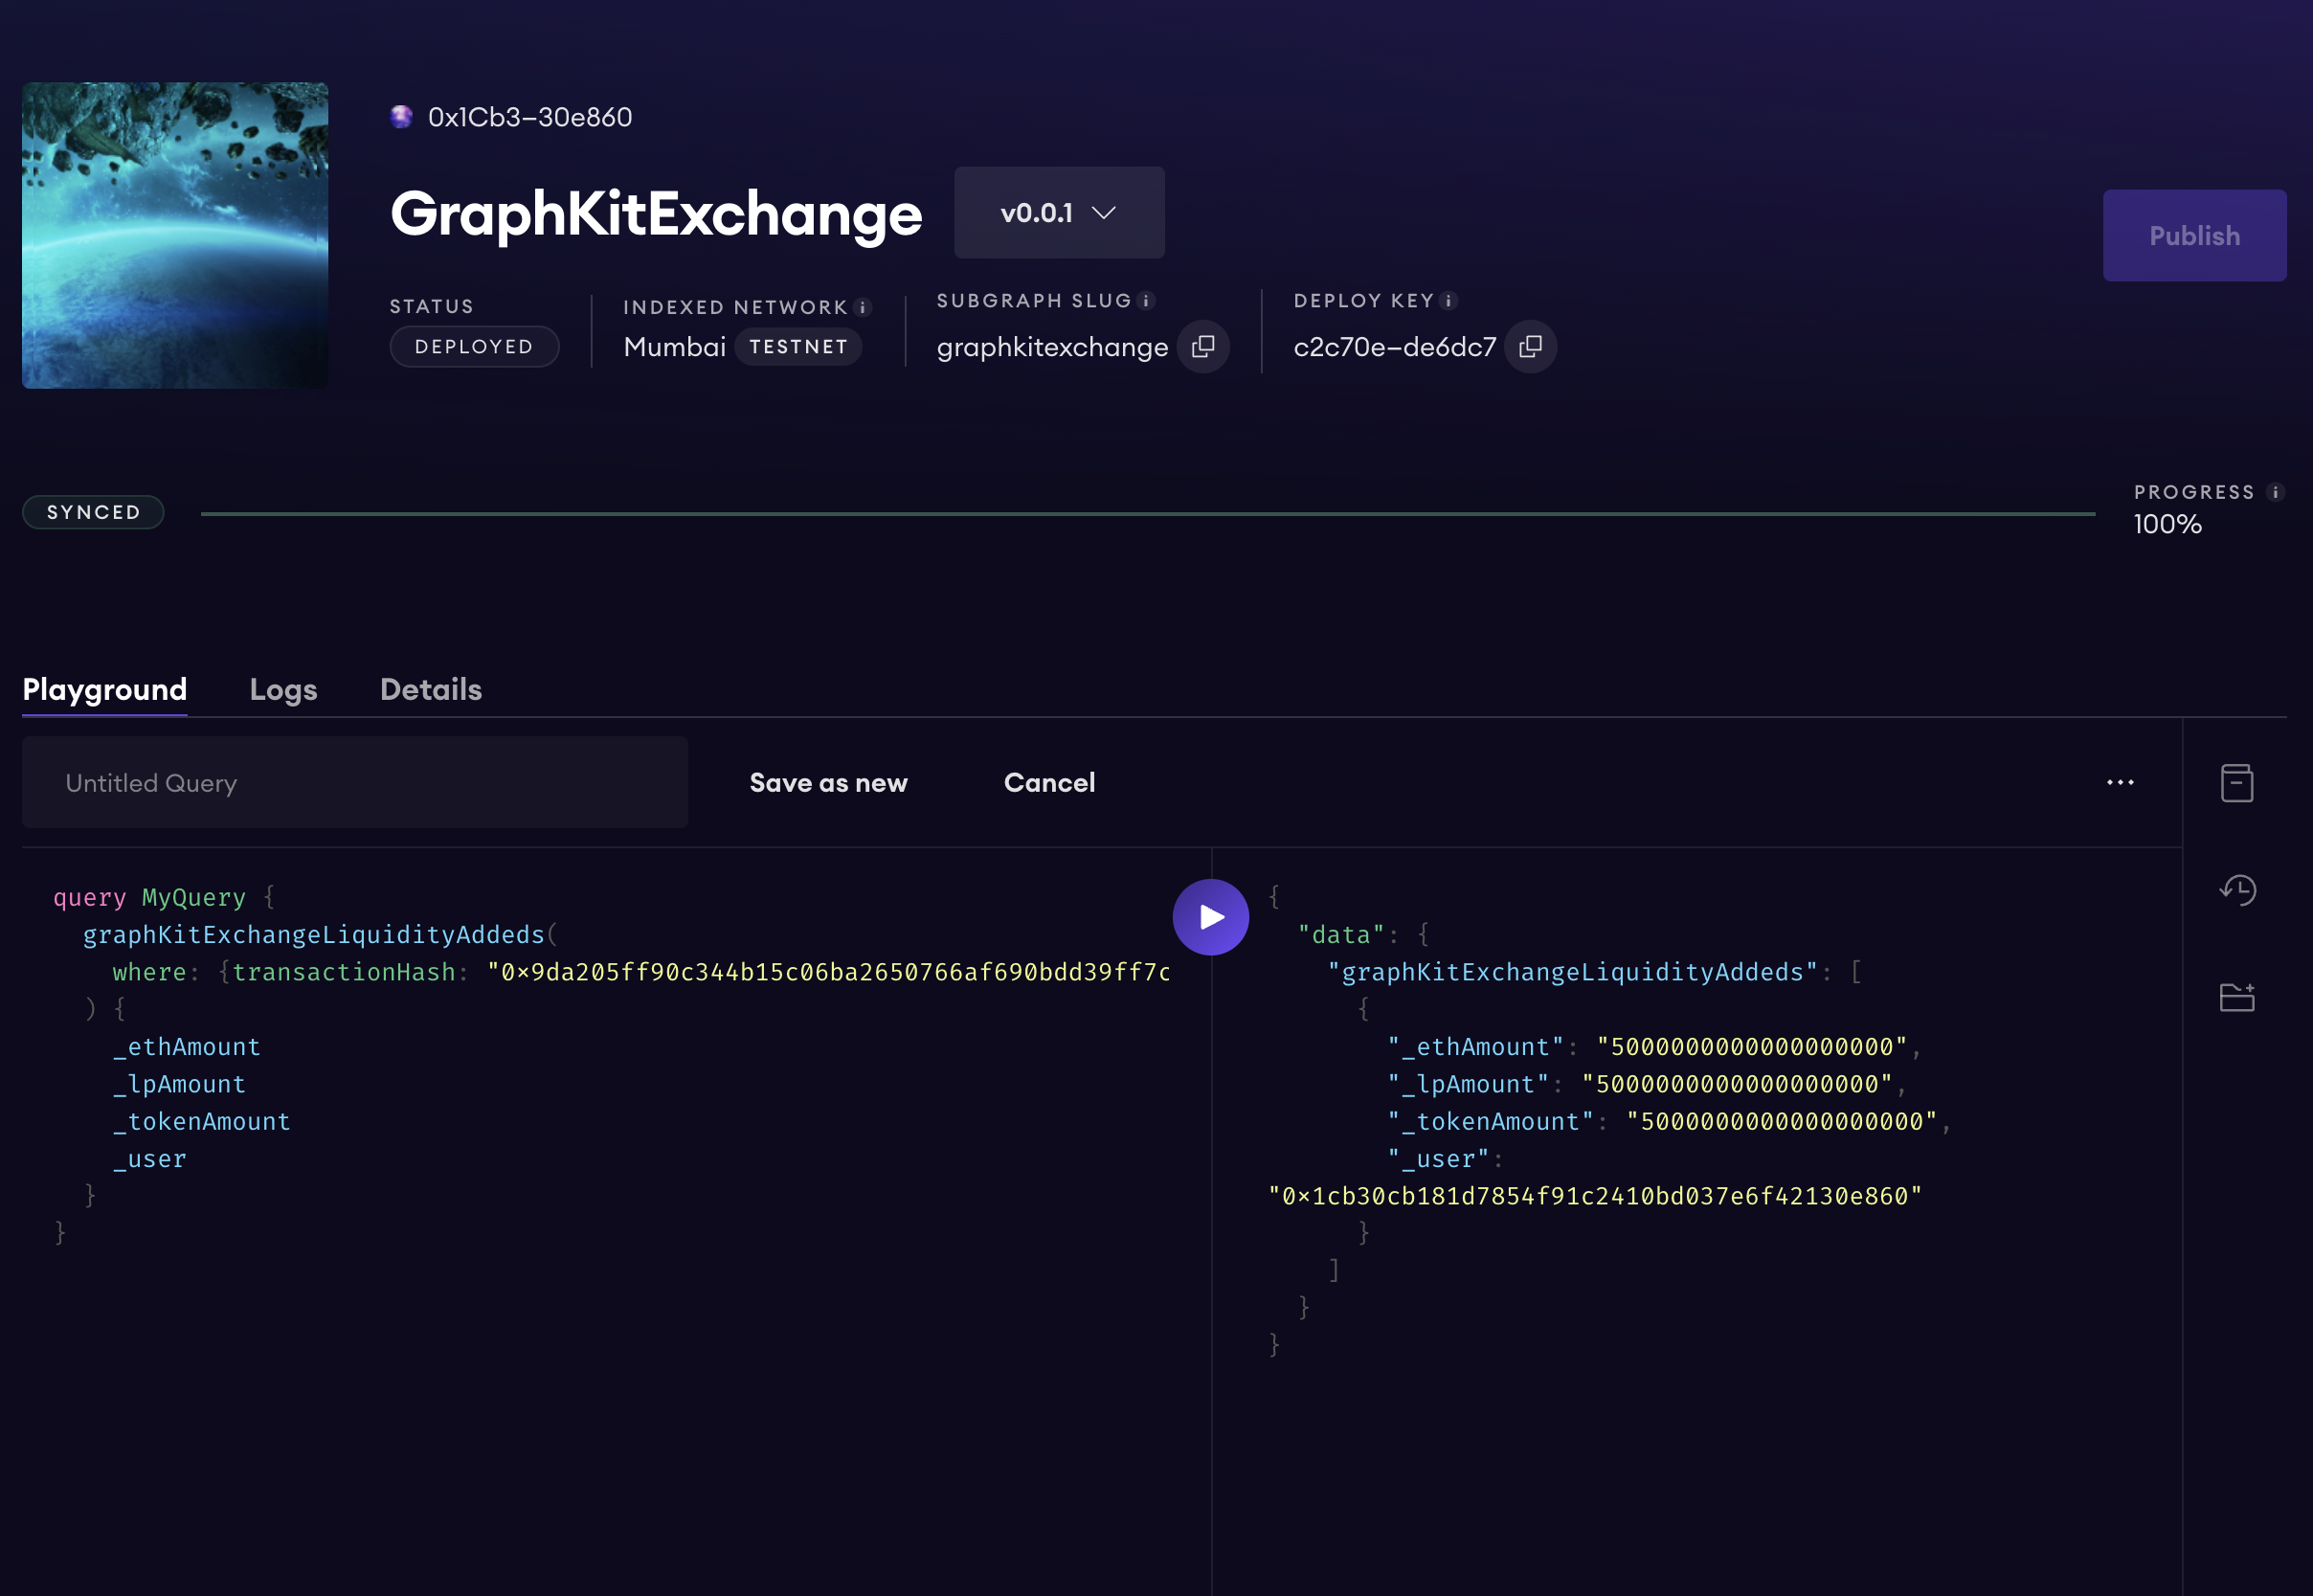
As you can see on the right side we got this 👇🏻
 {
   "data": {
     "graphKitExchangeLiquidityAddeds":
       [{
         "_ethAmount": "5000000000000000000",
         "_lpAmount": "5000000000000000000",
         "_tokenAmount": "5000000000000000000",
         "_user": "0x1cb30cb181d7854f91c2410bd037e6f42130e860"
       }]
     }
 }
It has the same data we emitted in our
GraphKitExchange__LiquidityAddedbut we didn't require to have the node setup or to some centralised node provided for this query.Querying with The Graph Protocol is superfast, decentralized and inexpensive.
TASK: Use the rest of the functions and query the subgraph for the events they emit.
Reference Links
I hope you have learned something today with this quite long blog.
If you have any queries, DM me on Twitter, Lenster or LinkedIn.
Happy Learning 🙌🏻
Keep Building 🧱🚀
About the author
A guy with curiosity about new tech and aims to help the generation save time.
Comments
Join the discussionNo comments yet. Be the first to comment.
